Since January 2024, we have been using SCCM to deploy the latest version of Xensor Agent. However, a few computers have not been successfully deployed.
Please follow the steps below to install the new version of Xensor Agent.
Install the new version of Xensor Agent :
Step 1. Run the exe Installer
1. Please choose the file according to your category.
- HQ : MTK.exe
- GCN : GCN-Client.exe
- EUS & APJ : EUS_APJ.exe
- Airoha :
- NonGCN : Airoha.exe
- GCN : Airoha_GCN.exe
2. Copy to the Drive D: and double-click the file to install Xensor.

Step 2. Check installation is completed
1. Open Task Manager to verify that the services are starting up correctly.

2. Please navigate to the following directory:
• Windows 32 bit: C:\Program Files(x86)\Xensor
• Windows 32 bit: C:\Program Files\Xensor
You will see the following files are present if Xensor is installed completely.
• XenLdr.exe
• XenLdr.exe.cfg
• XenAgent.exe
• XenAgent.exe.cfg
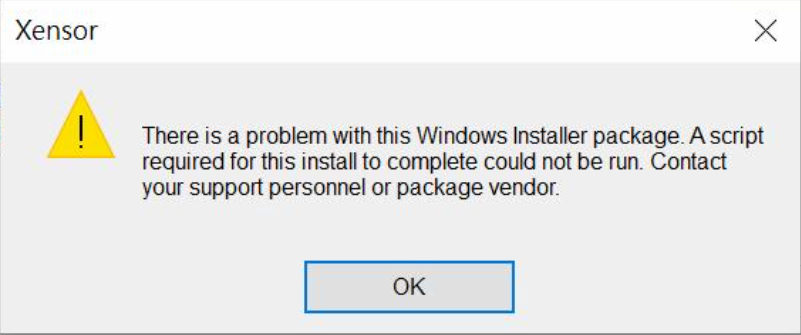
If the following error message pops up during the installation, you can refer to the following steps.
Error message :

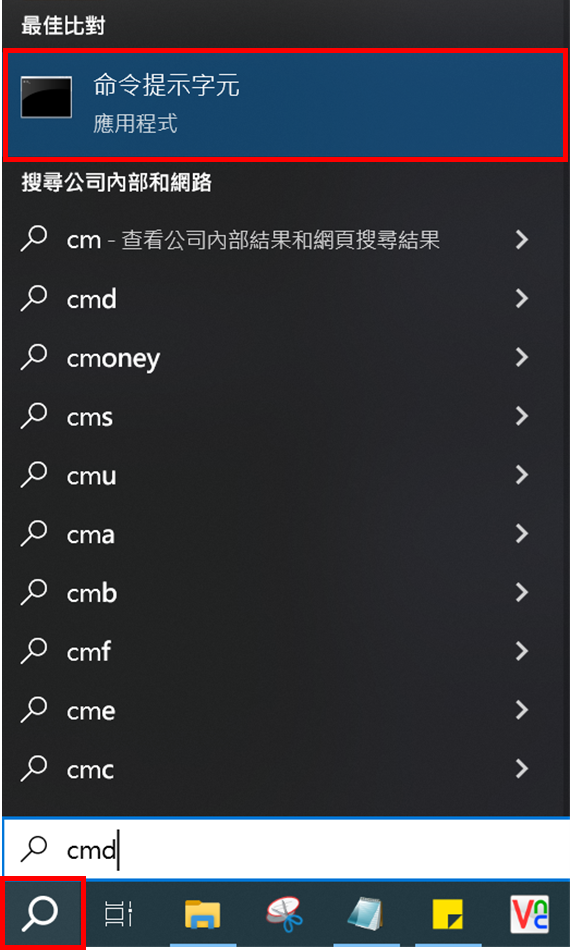
Step 1. Search “cmd” in the bottom left corner of the desktop.

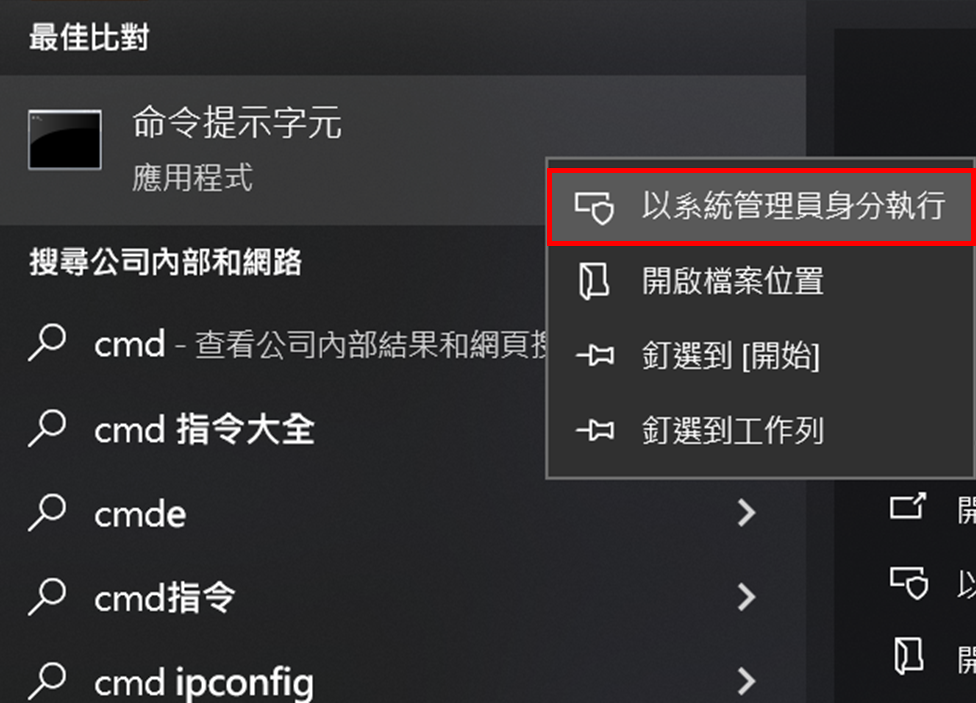
Step 2. Right-click and run as administrator.

Step 3. Run the exe file. (Enter the full path where the file is stored)

Step 4. Check installation is completed.
1. Open Task Manager to verify that the services are starting up correctly.

2. Please navigate to the following directory:
• Windows 32 bit: C:\Program Files(x86)\Xensor
• Windows 32 bit: C:\Program Files\Xensor
You will see the following files are present if Xensor is installed completely.
• XenLdr.exe
• XenLdr.exe.cfg
• XenAgent.exe
• XenAgent.exe.cfg
End.